
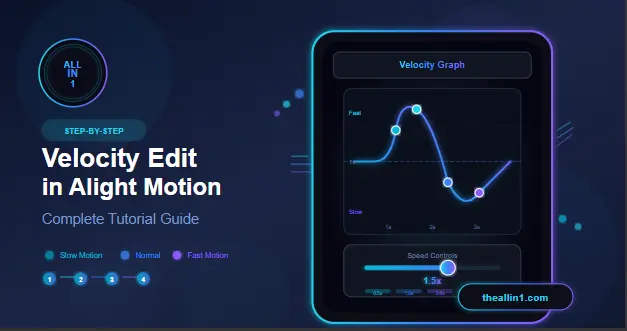
Step-by-Step Guide: Velocity Edit in Alight Motion
When I first started using Alight Motion, one of the frequent questions I encountered was about velocity edit—a valid question since this popular app didn’t initially offer this feature. The answer is straightforward: while velocity editing feature wasn’t available when the app first started, it’s now one of the strong features that makes this mobile video editing tool perfect for both novices and experts.
Dynamic Motion For Creators
As an editor and content creator myself, I’ve found that mastering velocity changes through speed ramping, slow motion, and fast forward effects has become essential for creating dynamic motion effects that stand out on social media platforms like TikTok, Instagram, Reels, and YouTube. What was once limiting for users—particularly those seeking professional editing capabilities on mobile—has transformed into an increasingly popular feature that gives you complete creative control over your video clips.
Desktop Power On Mobile
The beauty of Alight Motion lies in how it brings features typically found in desktop editing software to your Android or iOS device, making mobile editing truly powerful for beginners and professionals alike. Through its user-friendly editing interface, you can work with motion graphics, animation, and visual effects using a timeline where keyframes control everything from acceleration and deceleration to smooth transitions between different clip speed settings.
Master Speed Control Techniques
The video editing process involves adjusting playback speed, applying time remapping, and fine-tuning speed variations using curves and easing techniques that affect interpolation between points. As a filmmaker and video creator who works extensively with motion design and visual content, I rely on these editing tools for content creation across multimedia projects—whether I’m crafting digital art for post-production work or producing quick video content for video production clients. The editing techniques available through speed control and timing adjustments in the layers system, combined with understanding frame rate and how different transitions affect your motion animation, will help you master this technique and develop the skill needed for professional editing. If you want to learn through a proper tutorial or guide, this step-by-step how-to instructions approach focuses on the app features—including premium features and unlocked features available in the mod APK version with free download of the latest version updated for 2024 and 2025—that enhance your mobile creativity as a content creator working in today’s video landscape.
What Is Velocity Editing in Alight Motion?
Velocity editing is essentially the art of adjusting the speed of your video clips to create dramatic effects—you can slow down those epic moments or speed up boring transitions to match your creative vision. I’ve spent countless hours experimenting with different areas of my footage to see what works best, and honestly, learning how to manipulate velocity has transformed how I fit scenes into my project’s style and mood. Technically, velocity is connected to your video’s frame rate, which we measure in fps (that’s frames per second for those just starting out). More fps naturally provides you with slow, smooth movement when you stretch out a clip, while slower fps can make movement faster and more energetic when you compress time. Speed editing really brings a unique rhythm and feeling to your content, especially if you’re creating trending cinematic montages, music videos, or fast-paced reels that demand attention. Once you learn how to control velocity in Alight Motion Mod APK, you’ll discover endless possibilities for storytelling—from dramatic slow-motion hero shots to quick-cut action sequences that keep viewers hooked from start to finish.
How to Create Smooth Velocity Edits in Alight Motion
Follow these simple steps to create smooth and artistic velocity edits in your videos using Alight Motion. Begin by importing your clip into Alight Motion and include your preferred music, filters, text, stickers, or effects before editing the speed – I always do this first because it saves time later. Ensure your video is ready and organized layer by layer, then get your video ready for the actual velocity work. Once your video is complete, select the particular layer you prefer to modify – this can be the principal clip or any other feature that you wish to slow down or speed up. Choose the layer carefully because this determines what moves fast or slow. Now open the graph tool by looking for a graph symbol in the bottom-left part of the screen – once you select the layer, you will see this icon appear. Press this to access the velocity graph options, and this graph enables you to have dynamic speed alterations that make your edits look professional. Within the graph tool, you can modify the curve manually to align the speed curve exactly how you want it – a steep curve creates quick motion while a flatter curve gives you slower motion. Alight Motion makes it simple to set up ease in and ease out transitions, which cause your motion to look natural instead of robotic.
Final Adjustments And Export
Now select the speed control mode that best suits your project and use speed-controlled mode to fine-tune everything. Experiment with different possibilities to achieve the desired look, and once satisfied, save your changes and do it again for other layers if necessary. After doing velocity edits to all your layers, preview your video and make subtle adjustments if anything seems amiss. When you’re happy, export your project and share it on your favorite sites – this final touch and export step completes your velocity masterpiece.
Popular Velocity Edits and Trends
Velocity edits have become a huge trend across social media platforms, especially in dance videos, music clips, short vlogs, and sports highlights where creators sync their video’s motion with powerful music beats to create jaw-dropping transitions that make their content stand out. If you’re searching for inspiration or looking for ways to master the Popular Velocity edit technique in Alight Motion, start by exploring tutorials that are widely available online to understand the ability this app offers—velocity editing is often used by professionals and beginners alike, so don’t hesitate to try experimenting with different speed curves and keyframes to match your footage perfectly with the rhythm of your soundtrack, creating that smooth slow-motion-to-fast-motion effect that instantly grabs attention and elevates your editing game.
Conclusion
After spending countless hours experimenting with Alight Motion myself, I can confidently say this tool has completely transformed how I approach video editing. The capabilities it offers are genuinely impressive—from creating smooth slow-motion shots that add drama to your footage, to mastering velocity adjustments that make quick cuts flow seamlessly. What truly sets this platform apart is how it brings energy into every frame, making your videos come alive in ways traditional editors simply can’t match. Whether you’re looking to enhance a simple clip or create professional motion effects, the steps are surprisingly intuitive once you open the app and start experimenting.
Personal Experience And Results
I remember my first attempt at editing—I’d watch tutorial after tutorial, but nothing compared to actually diving in and learning through hands-on practice. The beauty of this popular software is that it lets you harness creative control without overwhelming you, transforming even basic footage into something truly beautiful. Your presentation will naturally elevate as you follow best practices and explore the advanced features. Don’t just take my word for it—download it, start creating, and see how quickly your content transforms from ordinary to extraordinary.
Leave a Reply